

If you celebrate Christmas, you might already be thinking about giving gifts safely amidst a pandemic. Even if you don’t celebrate Christmas, these ornaments make great wintertime decorations, as well as a great winter break activity. Give a personalized gift for Christmas, Hanukkah, Kwanzaa or for no occasion at all, or keep these cute decorations for yourself!
Snowman Ornament: This simple ornament idea takes very little time and effort to create, but the end result is a cute snowman buddy for your tree or for a decoration that can be used long after the holiday season.
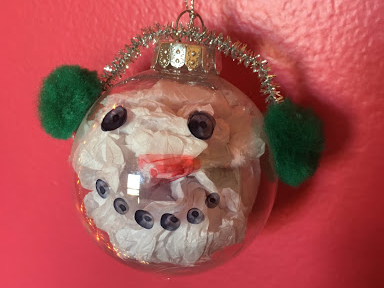
What you will need: Glass or plastic ornament bulb, white tissue paper or cotton balls, pipe cleaner, multicolored pom-poms, permanent markers and glue
1. Fill your ornament bulb with cotton balls or crinkled white tissue paper and replace the top of the ornament.
2. Cut pipe cleaner to desired length and glue each end to a pom-pom. Hot glue works best for this project, but any type of glue will work — just be sure to add enough pressure and hold the items together long enough to ensure they will stick.
3. Cover the inside of the pom-poms (the sides with the pipe cleaner attached) with glue and press onto each side of the ornament bulb. Hold for at least 30 seconds.
4. Using permanent markers, draw your Snowman’s face on the bulb.
Personalized Ornament: This ornament makes a perfect gift for friends and family members with the wide variety of items to choose to fill it with and colors to choose from. 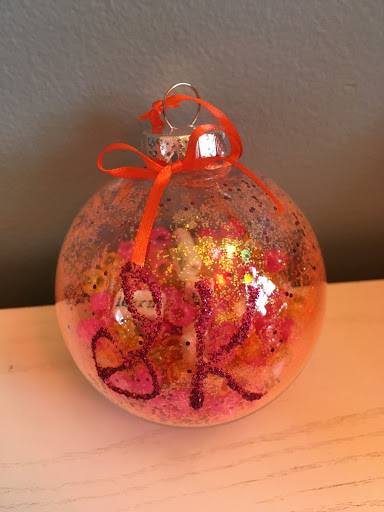
What you will need: Ornament bulb, glitter, glitter glue, beads (optional), small objects to personalize for recipient (optional) and ribbon
1. Fill the bottom of your ornament bulb with glitter in the color(s) of your choice. The amount of glitter used is up to individual preference, but a good rule of thumb is to use enough so that the glitter could fill your palm.
2. Replace the top on the ornament and spread the glitter by rotating the ornament in a circular motion. Continue until there is a thin layer of glitter on the inside of the plastic or glass, but some glitter still remains in the bottom of the ornament.
3. Remove the top of the ornament and use beads in the color of your choice to fill it. Again, the amount is up to personal preference. I used approximately two and a half handfuls of each color of bead.
4. As an optional step, you can also fill your ornament with additional, shaped beads and small objects that remind you of the recipient of the ornament or which you know they like. For example, in this ornament, I used beads that had words on them, as well as bees and ladybugs.
5. Replace the top of the ornament and shake the beads around so all varieties can be easily seen.
6. Cut a length of ribbon in a color of your choice and tie it in a knot beneath the lip of the top of the ornament. After you have tied a knot in the ribbon, tie it again to create a bow.
7. Using glitter glue, write the name or initials of the recipient of the ornament on the outside of the glass or plastic. Be sure the text can easily fit without needing to rotate the ornament and that the placement of the name is directly beneath the bow that you have tied. Although shorter names will usually fit well on the front, for longer names, initials might be easiest.
Blizzard Ornament: This ornament is another low-commitment, easy project, but this snowstorm-in-a-globe makes a great decoration for your tree or desk that can be used even after the holidays are over.

What you will need: Ornament bulb, liquid glue, silver or white glitter, cotton balls and glitter-tipped pom-poms (optional)
1. Use the liquid glue to create trails of glue on the inside of the ornament bulb. Make sure there are at least two trails of glue, but not so much that it begins to run.
2. Fill the inside of the ornament with glitter. The amount is up to you, but be sure it is enough to coat the inside of the ornament.
3. Replace the ornament top and rotate the ornament in your hand until there is a thick layer of glitter on the entire inner surface.
4. After the glue has dried, fill the inside of the ornament with cotton balls. I have also filled mine with glitter-tipped white pom-poms, but this addition is optional. The cotton balls should fill the ornament.